Image Map
Showing posts with label Decorating. Show all posts

Wednesday, February 5, 2014

Adventures in Decorating: Crochet Hearts

I don't really go all out on decorating for Valentine's Day...usually because I'm still exhausted from putting away all the Christmas decorations! But I do like to put up a few simple things. 

A few days ago I saw a YouTube video that showed you how to crochet these cute little hearts. Now, I am by no means a crochet expert. My skills are pretty much limited to a straight line, like to make a scarf, or a pot holder...but this video (link below) was so well explained and easy to follow, that after a few tries (and a few not so heart shaped balls of yarn!) I got it! I made about 10 of these little guys while I was watching TV one evening - they are super quick once you get the hang of it. Some of them I used to decorate the shelves that Daniel made for me that hang in our dining room: 


Aren't they cute! 

If you want to learn how to make your own crochet hearts, here is the video I used to learn how to make them.


The crafter who made this video has lots of other great crafting tutorials on her YouTube channel love4creativity. 

Do you decorate for Valentine's Day? 

Tuesday, October 1, 2013

Adventures in Decorating: Fall Front Door Make-Over

So you all know about our on going project in the basement. 
(Update on that coming soon!) 

It takes up most of our time, but every once and a while I get the inspiration to work on my own little house project. It usually has to do with decorating or painting something. 

Well, for a looooong time I've been wanting to paint our front door. It was white, which was fine, but I have been wanting something a bit more fun! So here is my project from this past weekend:


I painted the front door RED, and I LOVE it!
The color is Behr Ultra "Forbidden Red" and we got the paint & primer in one.
To see what the front of the house looked like with the white door 
Eventually the windows will all have the skinny, dark grey quarter round around them like the front door does, but that a project for another day! 
I also planted some dark red mums in the flower planter and plan on getting some pumpkins soon to put on the steps as well. So, what do you think? 

What color is your front door? 

Thursday, January 24, 2013

Adventures in Decorating: Valentine's Day Decorations

Thank you all for your sweet comments on our very first vlog post yesterday. I am sure it will not be the last vlog you will see here! If you missed it click {HERE} to get a video tour of our basement. 

I've been seeing lots of Valentine's Day crafts around blog land lately.
I have not had time to try any new crafts since most evenings are spent in the basement...
but I thought I would share some Valentine items I have made in the past...
Just click on the project name to see how I made them! 


AND

I've been working on a special 
Adventures in Love 
series for February 1st - February 14th.
Stay tuned, and get excited!   

Sunday, December 30, 2012

Adventures in Decorating: Outdoor Christmas Ball Ornament

In case you missed my tutorial I shared a few weeks ago on 
Here it is again! 
On the front corner of our house, next to the front door, we have a hook for a flower basket. Every fall I get sad when I have to take the flower basket down because that corner looks so empty and lonely. So, I decided to make an Outdoor Christmas Ball Ornament to hang on the hook in the winter to give that corner a little color and something interesting to look at. 

 I originally got the idea for this project when I was at Home Depot. They had these pretty, real pine balls that you could buy and hang outside. They were a little pricy and since they were real, you would only be able to use them for one Christmas. I am all about making things that can be reused year after year, so I decided to make my own!
 I purchased a large Styrofoam ball and gathered some artificial pine garland, red ribbon, artificial poinsettias, green felt, and my hot glue gun.

FIRST: I cut the felt into strips and hot glued the strips of felt to the outside of the styrofoam ball. Don't worry if there is some white styrofoam peeking out between the strips of felt. You will actually need small strips open later so don't totally cover the whole ball perfectly with the felt. It will kind of resemble a green volleyball when you get it all covered. 
 SECOND: Cut 2 long strips of ribbon and make an "X" with them on the table and set the bottom of the styrofoam ball on the middle of the "X". Using hot glue to secure the ribbon to the ball, bring each end of the ribbon around to the top of the ball. ( This was a little hard to get a picture of. Picture a globe with the South Pole and North Pole the red ribbon looks likes a line of latitude connecting the 2 poles...I know, I'm a Geography nerd. I love it!)
THIRD: Cut off 8 inch pieces of the pine garland. Starting at the top (or North Pole) of your ball, make a small hole in the styrofoam. Fill hole with hot glue and push the end of the piece of garland into the hole to secure it to the ball.


 Do the same with the other end of the strip of garland at the bottom (or South Pole) of the ball. Your goal is to cover all of the green felt with the garland. 
FOURTH: Spread out smaller branches of the garland to cover the green felt and tuck ends under the red ribbon securing with a little hot glue. Repeat this process until all green felt is covered. I needed 4 long strips of garland and then a few smaller filler pieces to fill in "bald spots".
FIFTH: Add any decoration you may want. I had these artificial poinsettias, and added 2, but you could use little bits of mistletoe, or pine cones, or even some little glass Christmas ornaments. I like to get stuff like this at the dollar store! Secure them to the ball with hot glue. I also added a little ribbon tail to mine. And the loop at the top to hang it by is made of the same ribbon. Once the hot glue has fully cooled, hang it outside! 
And there you have it. An Outdoor Christmas Ball Ornament that you can use to brighten that spot you hang a flower basket form in the summer, AND you can use it year after year.

Saturday, October 6, 2012

Adventures in Decorating: War With Squirrels!

Do you have squirrels where you live? 
(Do they live everywhere? I'm trying to remember a place where I have been where I have not seen them...) 

I remember in college we had a squirrel that lived near our apartment. It had only part of it's tale. We would see it every day. Squirrel-with-no-tail. That's what we called it. And it kind of became out little mascot. Squirrel-with-no-tail. I wonder if he is still around...

ANYWAY, last year I got the best pumpkin ever. It was perfectly shaped, with a great stem as a handle. I put it out on our front steps as a decoration next to my pot of mums. 


And guess what happened next. 

A squirrel (that did have a tail by the way) came and started nibbling on my pumpkin. It started out with just a few bites...but one day I came home from work to see the pumpkin "guts" all over the front steps! Yes, that evil squirrel had chewed a hole in the pumpkin and hollowed it out to make a nice little pumpkin home on my front steps! When I would pull into the drive way he would stick his little squirrel head out of the hole in the side of the pumpkin and give me this look like "What are you doing driving a car this close to my home!" Ok, I may be exaggerating a bit, but it did stick it's head out when I drove up. That squirrel destroyed my beautiful pumpkin. This meant war! We tried a few things to keep the evil squirrel away - I would not recommend using chili powder mixed in water with a squirt bottle...and if you do, I WOULD recommend wearing some kind of protective eye ware and a breathing mask so you don't get it in your eyes and lungs...I'm just sayin'! 


This year, I decided to try a different approach to protect my pumpkins. 
Did anyone get soap in their mouth for saying bad words or talking back when you were little? Anyone? (I actually don't remember my mom doing that with me... but I know people do it!) Well, I thought if people don't like the taste of soap, maybe squirrels don't either! So I took my dish soap and squeezed a ring of soap around each to the stems at the top of the pumpkin. Then, using my hands, I gently rubbed the soap down the sides of the pumpkin, coating the outside with a layer of soap. Don't rub to much or else it will start to suds up! The soap actually makes the pumpkin nice and shiny almost like a glaze.

I have applied dish soap once a week for 3 weeks now. Each pumpkin has a little nibble area about the size of a dime, but that is all! Hooray! Dish soap is my secrete weapon in my war with the squirrels! 

How do you keep the critters away from your fall decorations? 

Remember to be taking those fall color pictures and come back on Thursday to show them off in the first annual 
Click {HERE} for more details! 

Tuesday, June 5, 2012

Adventures in Decorating: Paper Fire Crackers!

Pinterest Challenge
Do you pin?
Cuz I do!
Kara at Happy Go Lucky does this fun link party on the 1st of every month and this month I am playing along! Basically you pin and then you create. 
I just started a "4th of July" board, and the first thing I pinned was this

              Source: marthastewart.com via Veronica on Pinterest

When I went to the Martha Stuart website, the directions were a little hard to follow (as in no pictures and lots of words!). I am more of a visual learner, so I took pictures of each of the steps as I figured them out for you to see how to make these cute little paper fireworks (don't you think they kind of look like little fireworks!) And I added my own words to describe what I was doing...


Taadaa! I'm off to make some more so I can string them together to make a cute and crafty 4th of July decoration! 
What is the last thing you pinned?
I am also sharing this on...

Tuesday, May 15, 2012

Adventures in Decorating: Mother's Day Table

I have been seeing around Pinterest for a while these cute little flowers made from felt.
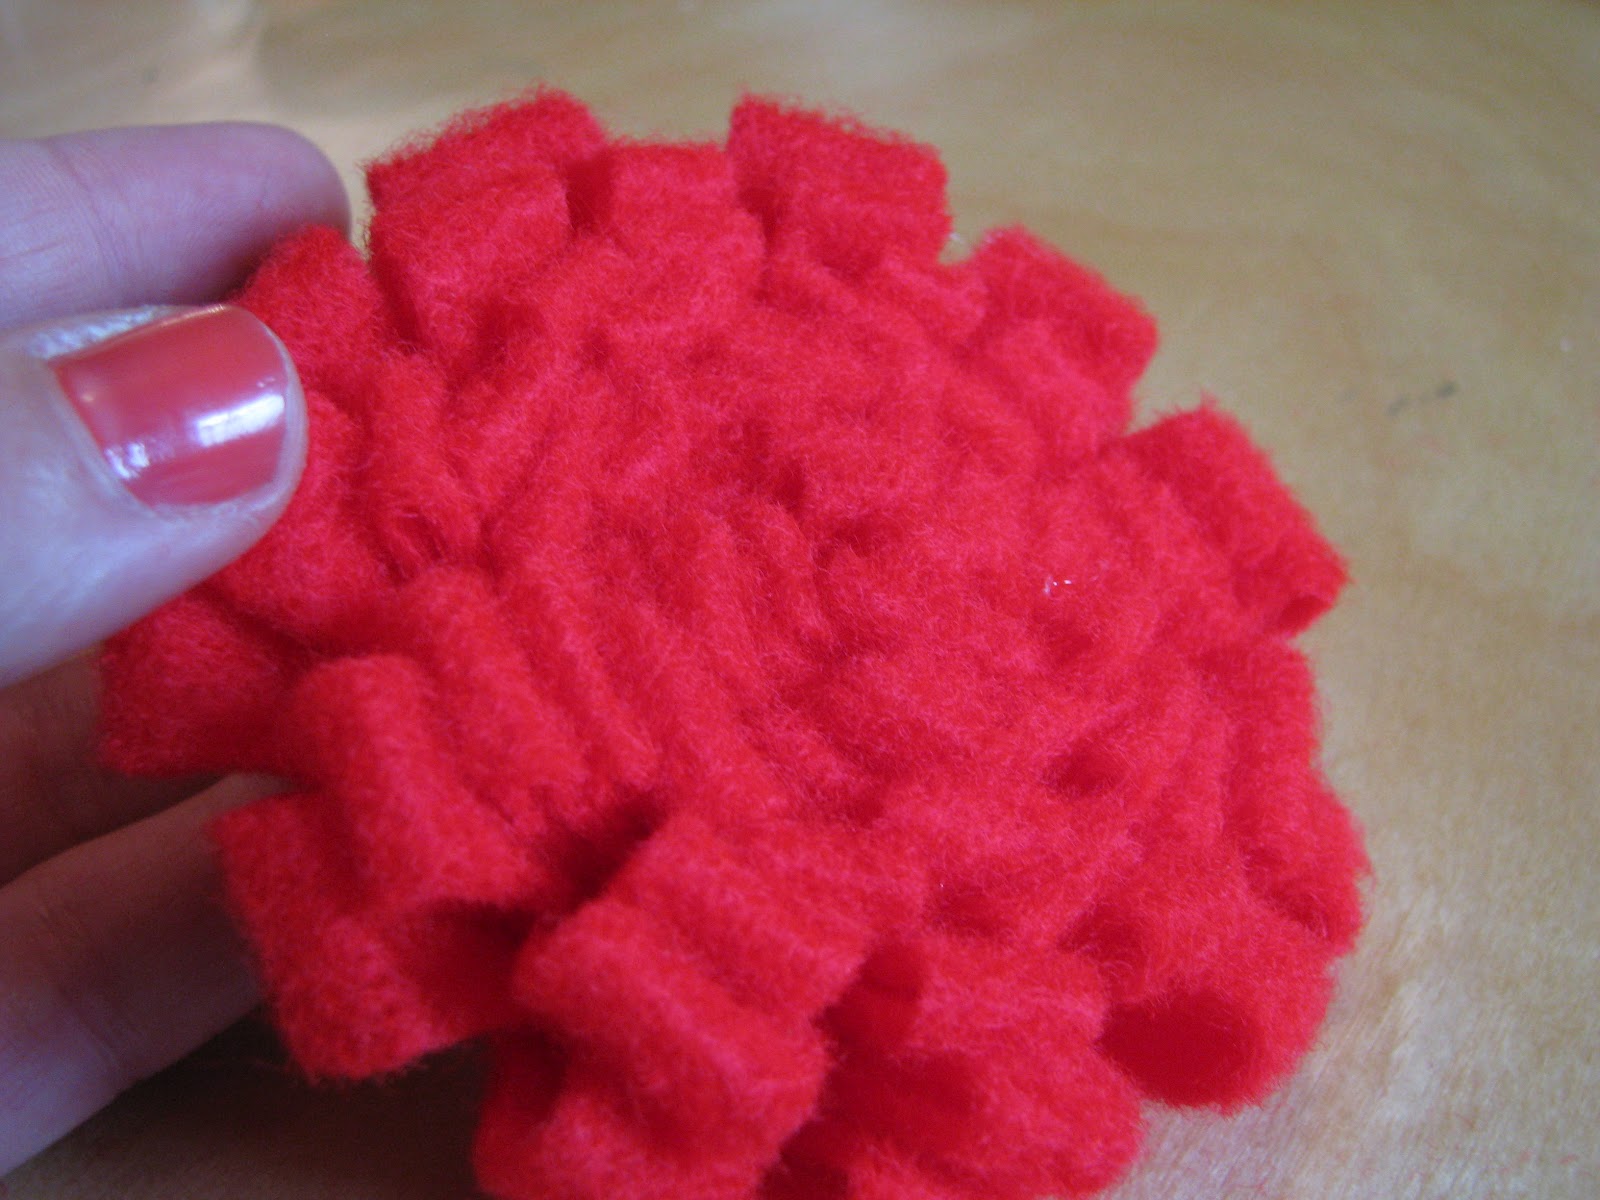
So when I was deciding what to have on the table for our Mother's Day dinner, I wanted to give these a try. They are SO easy and to make 5 of them took me less than 30 minutes.
Supplies to gather: Felt, hot glue, pencils (or dowels), green floral tape, and scissors.
Step 1: Cut a strip of felt about 2 inches wide. The longer your strip, the larger your flower. I had a big roll of felt that I used so my strips were about 2 feet long by 2 inches wide. Fold the felt strip in half and cut 1/2 inch snips about 1/2 of an inch apart. Make sure you don't cut all the way through the strip...
Step 2: With the strip folded in half, start rolling from one end of the strip.
Step 3: As you roll, put small drops of hot glue on the side that doesn't have the snips cut out of it (or what I consider to be the back side of the flower...)
Keep rolling and glueing every few inches. This is what the front of the flower will start to look like.
And this is what the back of the flower will start to look like. 

Step 4: Once you have rolled to the end of the felt strip, secure end with hot glue.
Step 5: I covered a pencil with green floral tape the same way I did {HERE} and used hot glue to secure it to the back of the flower as the stem. 
Step 6: Cover the top part of the pencil with a piece of matching felt and glue down at the sides. 
Tada! I would have added leaves, but I didn't have any green felt...but I could always add them later. 

Monday, April 30, 2012

Adventures in Decorating: Baby Shower Prayer Wreath

One of the activities we did at the the baby shower I hosted was to pray for the baby (well, the Mommy and Daddy too) and we wrote each of the prayers on a slip of paper.
The slips of paper were then woven into a wreath that I made as part of my gift for the baby.
Here is a little more detail about the wreath. It is nothing to complicated:
I started with a bare wreath and some fake flowers...
(same flowers used for these flower pens)
and, of course...
my glue gun...
I chose 3 different types of flowers, and one of them was like a branch of little flower blossoms. So I wrapped the branches around the wreath and secured them to it with little bits of hot glue along the way. 

The I use the other 2 types of flowers to make 2 bundles of flowers (one large and one small).
There is really no wrong way to do this part. Just whatever you think looks good.
I wanted to keep mine kind of sparse and simple, yet pretty. 

Next I added a little banner on a ribbon across the middle. And then when the guests finished their prayer papers, I wove those in too. You can kind of see them on the top right side of the wreath in this picture. 
Once all the prayers were on, the pink paper wrapped all the way around. 

You can't totally read all of the writing, but that's ok. Just having it hanging up in the baby's room will remind the new mommy that people are praying for her. 

Sunday, February 19, 2012

Adventures in Decorating: Valentines Table

I didn't go all out for Valentine's Day decorating, 
but I wanted to share my dining room table decor...
It is not over the tops hearts and V-day, so I think I will keep it up for a while...
Hope you are having a great weekend!